Illinois Agility Test
The Illinois Agility Test (IAT) is used to test an athlete’s agility, i.e. his ability to quickly change direction. In order to fully assess the athlete’s abilities, the test must be conducted on both sides.
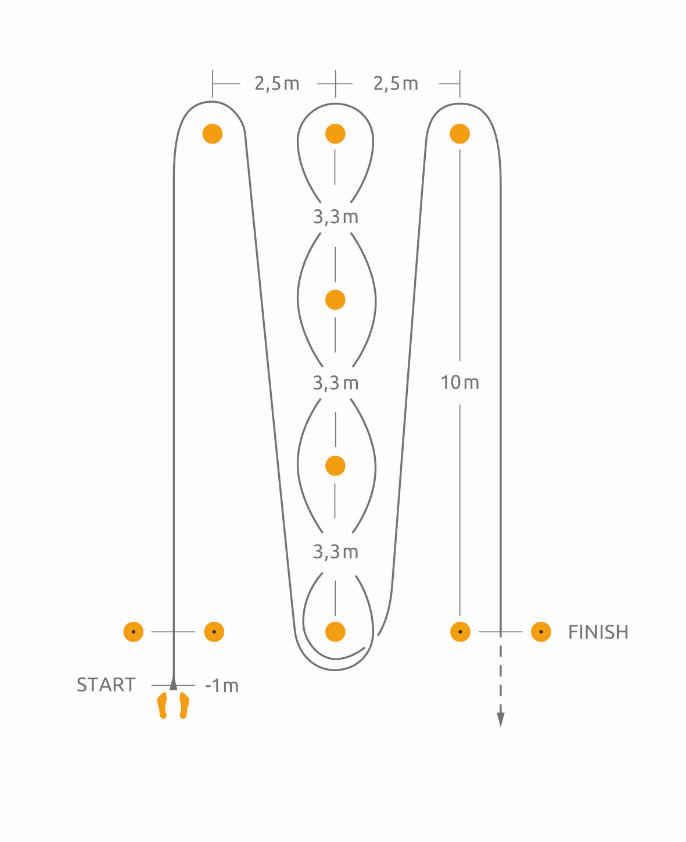
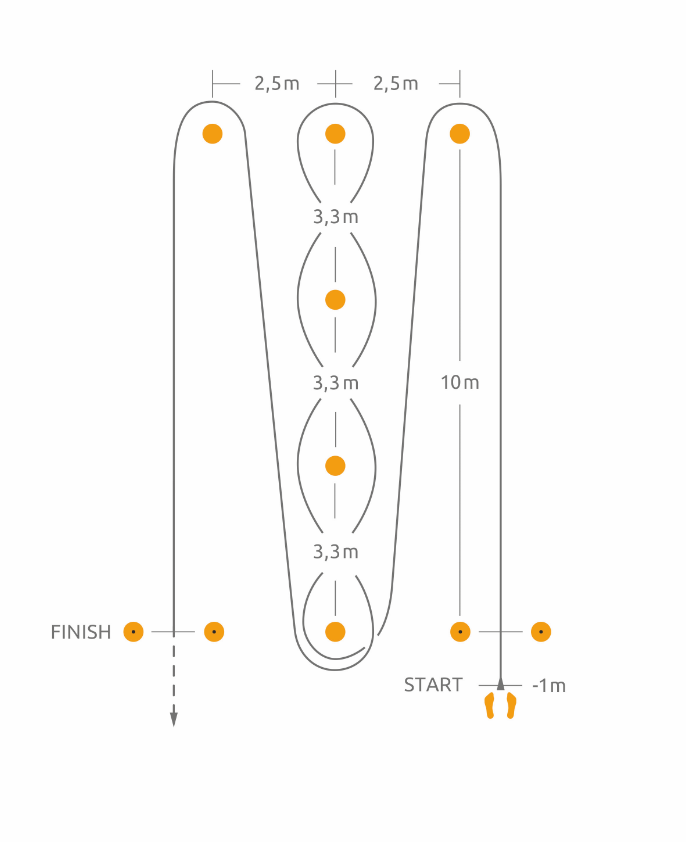
Set up the course field
Set up the 6 cones and 2 timing gates according to the figures above. Place a timing gate at the start and a timing gate at the finish
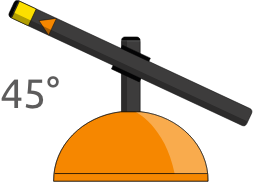
Our recommendation
Angle the two magnetic elements on the inside, this leads to better measurement results!
Attention
– The player starts from the start position, 1m before a timing gate.
– Before and after each run, a standing time of at least 1 second should be observed. This allows the sensor to detect the beginning and end of the exercise.
This is how you find the test results in the software
The test results are displayed in the Diagnostics software under the “Runs” tab.
Arrowhead Agility Test
The Arrowhead Agility Test (AAT) is a simple but effective test to assess the agility of an athlete. Although it can be used for many team sports, it is most commonly used in football. In order to fully assess the athlete’s abilities, the test must be conducted on both sides.
Set up the course field
Place three magnetic elements with a distance of 1.2 m between each element. Place
a cone 10m from the start line, another cone 15m from the start line. To the left and right of the 10m cone position two cones, each at a distance of 5m.
Attention
– The player starts from the start position, 1m before a timing gate.
– Before and after each run, a standing time of at least 1 second should be observed. This allows the sensor to detect the beginning and end of the exercise.
This is how you find the test results in the software
The test results are displayed in the Diagnostics software under the “Runs” tab.
Three Cone Drill
The Three Cone Drill (3CD) is one of the most common agility tests in American football and is used for player evaluation in the NFL Combine, but is suitable for all sports with high demands on agility, relatively short operating times and the need to manoeuvre in confined spaces.
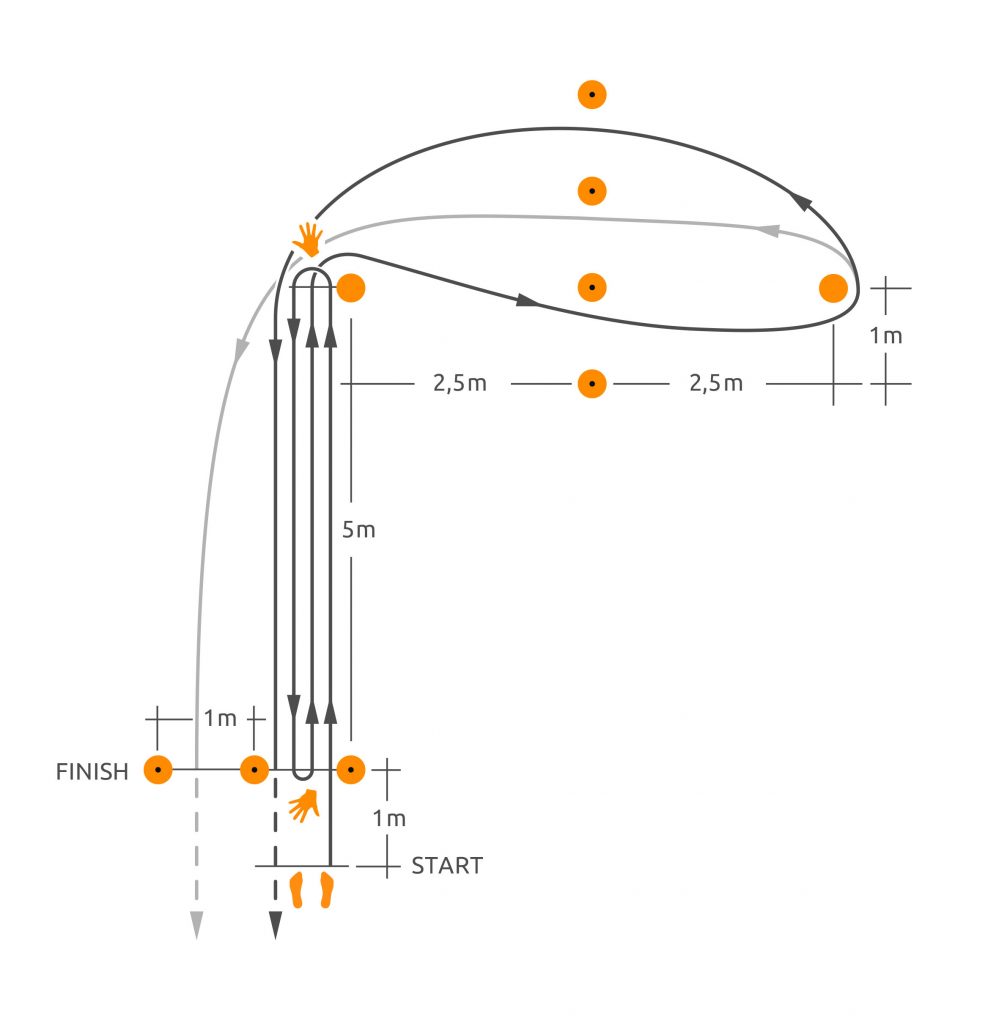
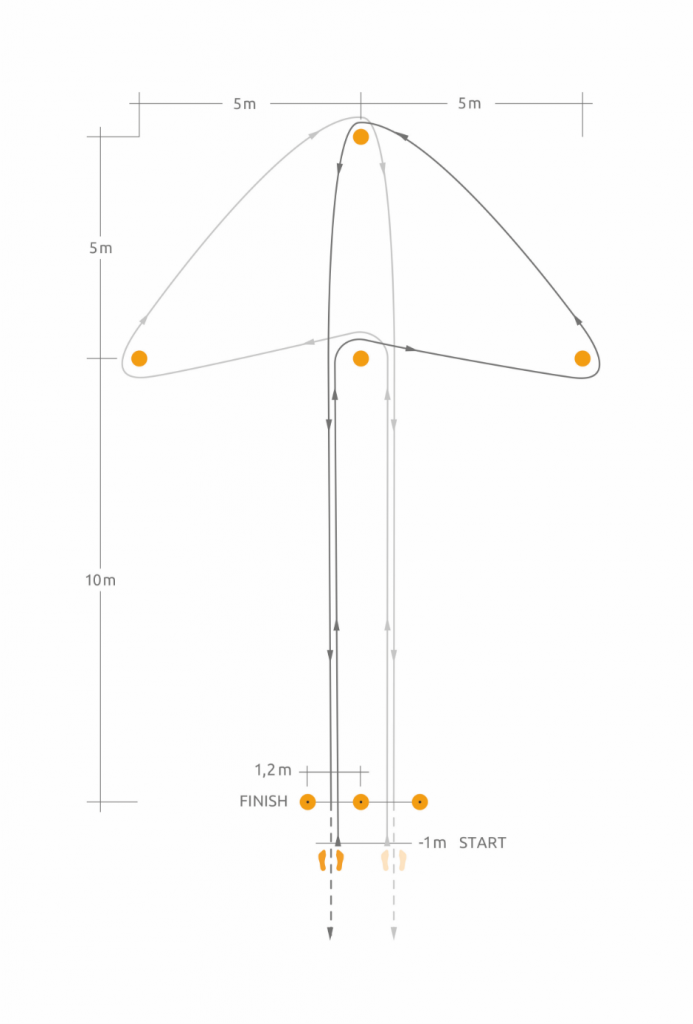
Set up the course field
At the start, 3 magnetic elements are set up at a distance of 1-1.2m each. A cone is placed 5m from the starting line. Another cone is positioned at an angle of 90 degrees, 5m from the first cone. Position four magnetic elements in the middle between the two cones at intervals of 1-1.2m each.
How to perform the Three Cone Drill
The athlete runs to the cone, bends down and touches the ground with his right hand and turns over his left shoulder.
Then he runs back to the starting line, bends down and touches the line with his right hand and turns over the left shoulder again.
Then he runs back to the cone and circles it outside (right shoulder inside), sprints towards the inside of the other cone and then around the outside of the cone (left shoulder inside).
The athlete runs back and around the first cone (left shoulder inside) before accelerating to the timing gate and running over the starting line.
Attention
– The player starts from the start position, 1m before a timing gate.
– Before and after each run, a standing time of at least 1 second should be observed. This allows the sensor to detect the beginning and end of the exercise.
This is how you find the test results in the software
The test results are displayed in the Diagnostics software under the “Runs” tab.
5-10-5 Shuttle (Pro Agility Test)
The 5-10-5 Shuttle, or Pro Agility Test, consists of rapid directional changes in a linear plane and is typically used in American football, basketball, soccer and most other sports.
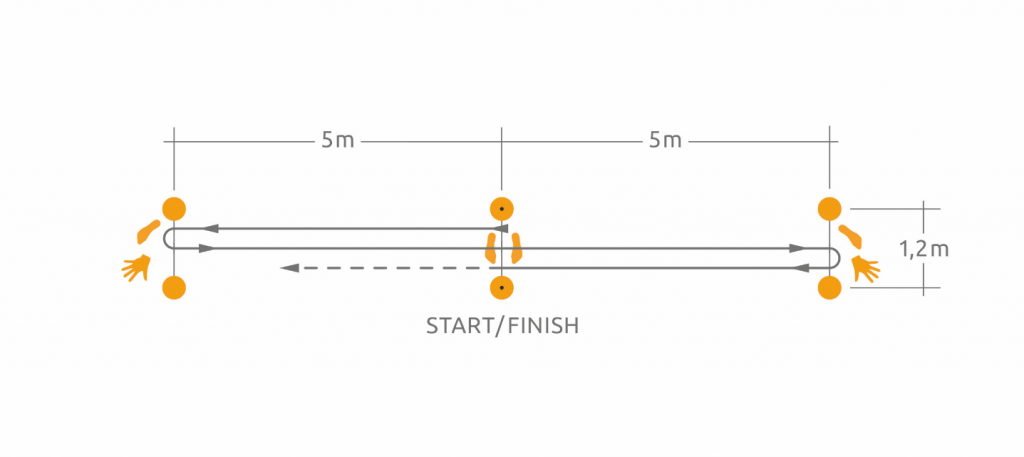
Set up the course field
Position two magnetic elements on the start line at a distance of 1.2m, this forms the start line. 5m away from the magnetic elements, set up 2 cones each to mark the turning lines.
How to perform the 5-10-5 Shuttle
The athlete positions himself in a 3-point position on the starting line. The feet should be shoulder-wide and evenly spaced on both sides of the starting line. The hand touching the ground during the 3-point position determines in which direction the athlete should run. This means that if the athlete starts to the right, he must start with his right hand on the starting line and vice versa.
Example of starting with the right hand on the starting line:
The athlete starts the run by accelerating to the right up to the turning line. At the turning line he touches it with his right foot and right hand and then turns over his left shoulder. He then sprints in the other direction to the opposite turning line. This time the left hand and the left foot touch the line. Then he turns over his right shoulder. To complete the test, the athlete sprints over the starting line. The inner hand must not touch the ground in any change of direction.
Attention
– Before and after each run, a standing time of at least 1 second should be observed. This allows the sensor to detect the beginning and end of the exercise.
– To ensure comparability, we recommend that you define and use a standard starting position of your choice. Use the “Comment” field in the results if you deviate from your standard.
This is how you find the test results in the software
The test results are displayed in the Diagnostics software under the “Runs” tab.
Custom Agility Test
The Custom Agility Test allows coaches and athletes to create their own tests. Either to adapt them as specifically as possible to the respective sport or to use known tests (e.g. 505 test) which are not integrated in SmarTracks Diagnostics. In order to create and perform such tests, certain requirements must be met.
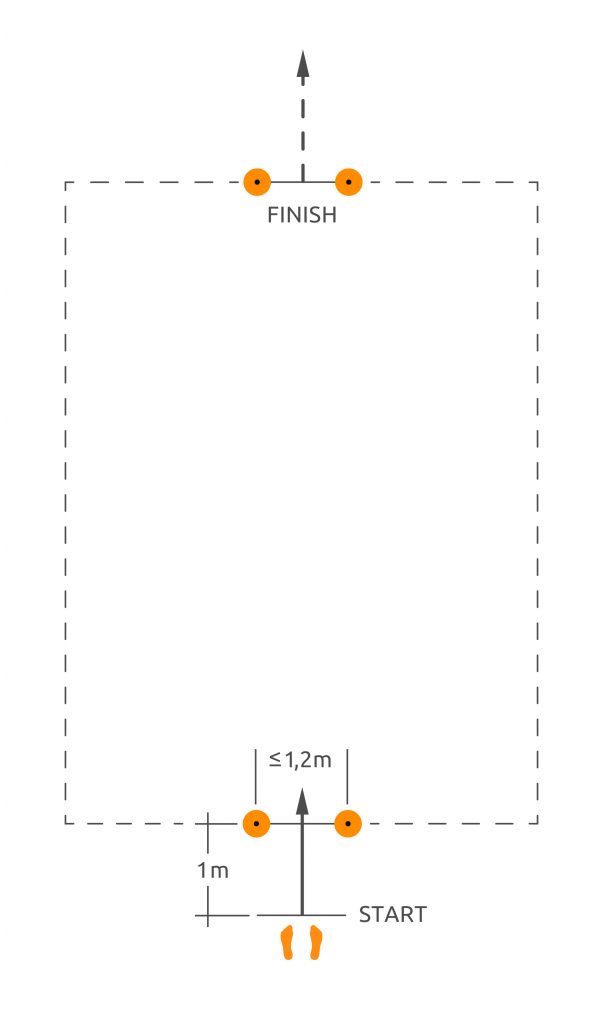
Set up the course field
For the Custom Agility Test you may set up a maximum of 2 gates (2×2 magnetic elements). A gate is formed by positioning two magnetic elements at a maximum distance of 1.2m.
You can either set up a gate both for the start and finish line or a single gate that serves as the start and finish line.
If you set up 2 gates, they should be at least 5m apart.
Turning should take place at a distance of at least 5m from a gate.
Attention
– The player starts from the start position, 1m before a timing gate.
– Before and after each run, a standing time of at least 1 second should be observed. This allows the sensor to detect the beginning and end of the exercise.
– All runs should be carried out without play equipment (e.g. ball) .
– Do not run sideways or backwards.
This is how you find the test results in the software
The test results are displayed in the Diagnostics software under the “Runs” tab.